皆さんこんにちは。とらのあなラボのY.Fです。
今回は、いわゆるWYSIWYGエディタを簡単に実装できるquill.jsというライブラリについて紹介してみたいと思います。
ついでにVue.jsと組み合わせて使ってみます。
環境
今回はnode.js 14.9.0がインストールされていればOKです。
$ node -v
v14.9.0
準備
はじめにサクッと色々準備します。
vueプロジェクトの初期化には先日リリースされたvue3を使います。
$ npm install -g @vue/cli
$ vue create quill-vue3
$ cd quill-vue3
$ npm run serve
vue3から vite というCLIツールが使えるようになっていますが、今回は慣れ親しんだvue-cliを利用します。
viteについて知りたい方はこちらを参照してください。
vue createの選択肢はvue3とTypeScriptが使えるように選択してください。
package.jsonでvue3が入ってることを確認できたらOKです。
{
  "name": "quill-vue3",
  "version": "0.1.0",
  "private": true,
  "scripts": {
    "serve": "vue-cli-service serve",
    "build": "vue-cli-service build",
    "test:unit": "vue-cli-service test:unit",
    "test:e2e": "vue-cli-service test:e2e",
    "lint": "vue-cli-service lint"
  },
  "dependencies": {
    "core-js": "^3.6.5",
    "vue": "^3.0.0-0",
    "vue-router": "^4.0.0-0",
    "vuex": "^4.0.0-0"
  },
  "devDependencies": {
    "@types/jest": "^24.0.19",
    "@typescript-eslint/eslint-plugin": "^2.33.0",
    "@typescript-eslint/parser": "^2.33.0",
    "@vue/cli-plugin-babel": "~4.5.0",
    "@vue/cli-plugin-e2e-cypress": "~4.5.0",
    "@vue/cli-plugin-eslint": "~4.5.0",
    "@vue/cli-plugin-router": "~4.5.0",
    "@vue/cli-plugin-typescript": "~4.5.0",
    "@vue/cli-plugin-unit-jest": "~4.5.0",
    "@vue/cli-plugin-vuex": "~4.5.0",
    "@vue/cli-service": "~4.5.0",
    "@vue/compiler-sfc": "^3.0.0-0",
    "@vue/eslint-config-prettier": "^6.0.0",
    "@vue/eslint-config-typescript": "^5.0.2",
    "@vue/test-utils": "^2.0.0-0",
    "eslint": "^6.7.2",
    "eslint-plugin-prettier": "^3.1.3",
    "eslint-plugin-vue": "^7.0.0-0",
    "node-sass": "^4.12.0",
    "prettier": "^1.19.1",
    "sass-loader": "^8.0.2",
    "typescript": "~3.9.3",
    "vue-jest": "^5.0.0-0"
  }
}
続いて、quill.jsと型定義をインストールします。
$ npm install --save-dev quill@1.3.6 @types/quill
vue用のquill.jsラッパーライブラリもありますが、今回は利用しない方針で行きます。
準備できたので次から実装していきます。
実装
ではまずエディタを表示しましょう。
こちらが参考になりますが、vue2で書かれているので、vue3に直しつつ実装します。
まずは、ファイルを作って以下の様に記載します。
$ touch src/components/Editor.vue
(Editor.vue)
<template>
  <div class="editor-container">
    <div id="vue-quill-editor" ref="quillEditor"></div>
  </div>
</template>

<script lang="ts">
import Quill from "quill";
import { defineComponent, reactive, onMounted, SetupContext, ref } from "vue";

interface State {
  editor: Quill | null;
}
interface Props {
  value: string;
}

export default defineComponent({
  props: {
    value: {
      type: String,
      default: ""
    }
  },
  setup(props: Props, ctx: SetupContext) {
    const state = reactive<State>({ editor: null });
    const quillEditor = ref<HTMLDivElement>();
    const editorValue = computed(() => props.value);

    const update = () => {
      if (!state.editor) return;
      ctx.emit(
        "editor-change",
        state.editor.getText() ?  state.editor.root.innerHTML : ""
      );
    };

    onMounted(() => {
      if (!quillEditor.value) return;
      const editor = new Quill(quillEditor.value, {
        modules: {
          toolbar: [
            [{ header: [1, 2, 3, 4, false] }],
            ["bold", "italic", "underline"]
          ]
        },
        theme: "snow",
        formats: ["link", "bold", "underline", "header", "italic"],
        bounds: document.body,
        debug: "warn",
        placeholder: "文章を入力してください。",
        readOnly: false
      });
      editor.root.innerHTML = props.value;

      editor.on("text-change", () => update());
      state.editor = editor;
    });
    return {
      state,
      quillEditor,
      update,
      editorValue
    };
  }
});
</script>
<style lang="scss" scoped>
.ql-container {
  font-size: 18px;
}
</style>
Quill.jsは直接DOMを参照し変更するライブラリなため、上記の様にエディタ部分のみを1コンポーネントに押し込みます。
この様にすることで、親コンポーネントからは通常のコンポーネントのようにPropsなどを渡すだけでよく、あとの処理はこのコンポーネントの中でDOM操作含め、よしなに行うことができます。
また、ツールバーなどのエディタに必要なものもこのコンポーネント内で設定します。
基本は通常のQuill.jsの使い方と同様です。
続いて、App.vueを編集してEditor.vueを呼び出します。
(App.vue)
<template>
  <div id="app">
    <h1>
      <div>VueとQuill.jsのサンプル</div>
    </h1>
    <quill-editor :value="state.editorText" @editor-change="input" />
  </div>
</template>

<script lang="ts">
import { defineComponent, reactive } from "vue";
import QuillEditor from "./components/Editor.vue";

interface State {
  editorText: string;
}

export default defineComponent({
  name: "App",
  components: {
    QuillEditor
  },
  setup() {
    const state = reactive<State>({
      editorText: ""
    });
    const input = (text: string) => {
      state.editorText = text;
    };
    return { state, input };
  }
});
</script>

<style lang="scss">
@import "~quill/dist/quill.core.css";
@import "~quill/dist/quill.snow.css";
#app {
  font-family: Avenir, Helvetica, Arial, sans-serif;
  -webkit-font-smoothing: antialiased;
  -moz-osx-font-smoothing: grayscale;
  text-align: center;
  color: #2c3e50;
  margin-top: 60px;
}
#vue-quill-editor {
  border: solid;
}
</style>
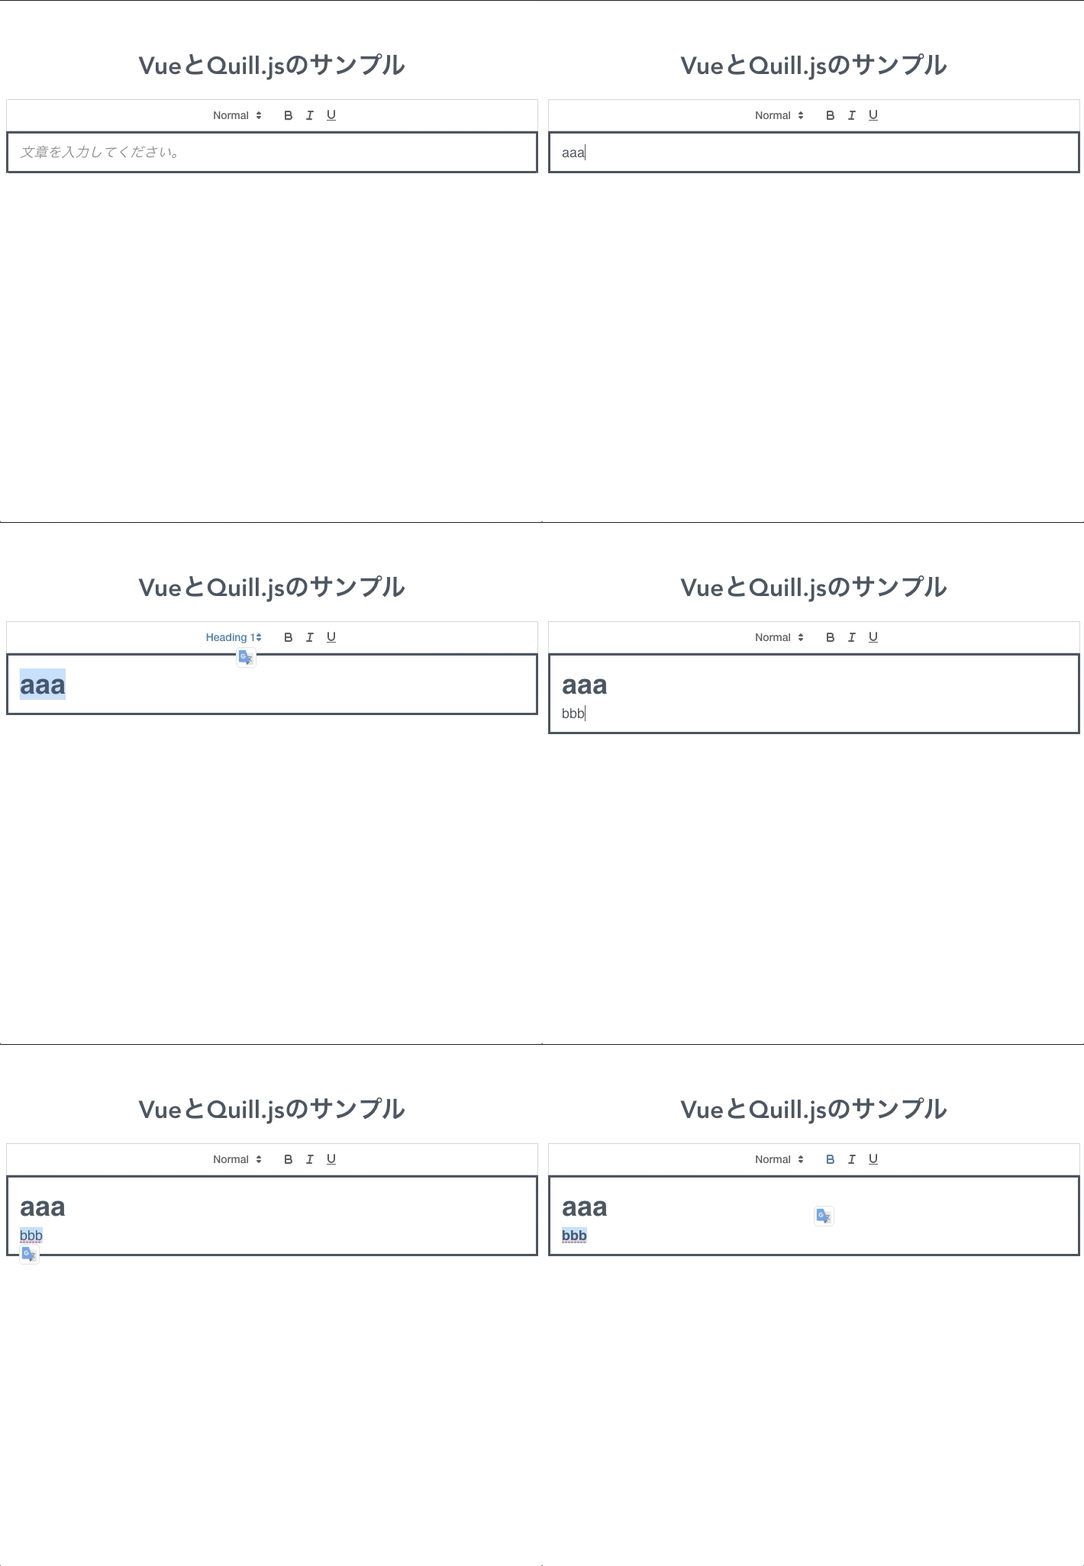
これでエディタが表示されます。簡単ですね。

ここで、どうやって情報をやり取りしてるのか見てみましょう。
Editor.vueのtemplate部分を以下のように編集します。
<template>
  <div class="editor-container">
    <div id="vue-quill-editor" ref="quillEditor"></div>
  </div>
  <div>
    <pre>
      {{ editorValue }}
    </pre>
  </div>
</template>

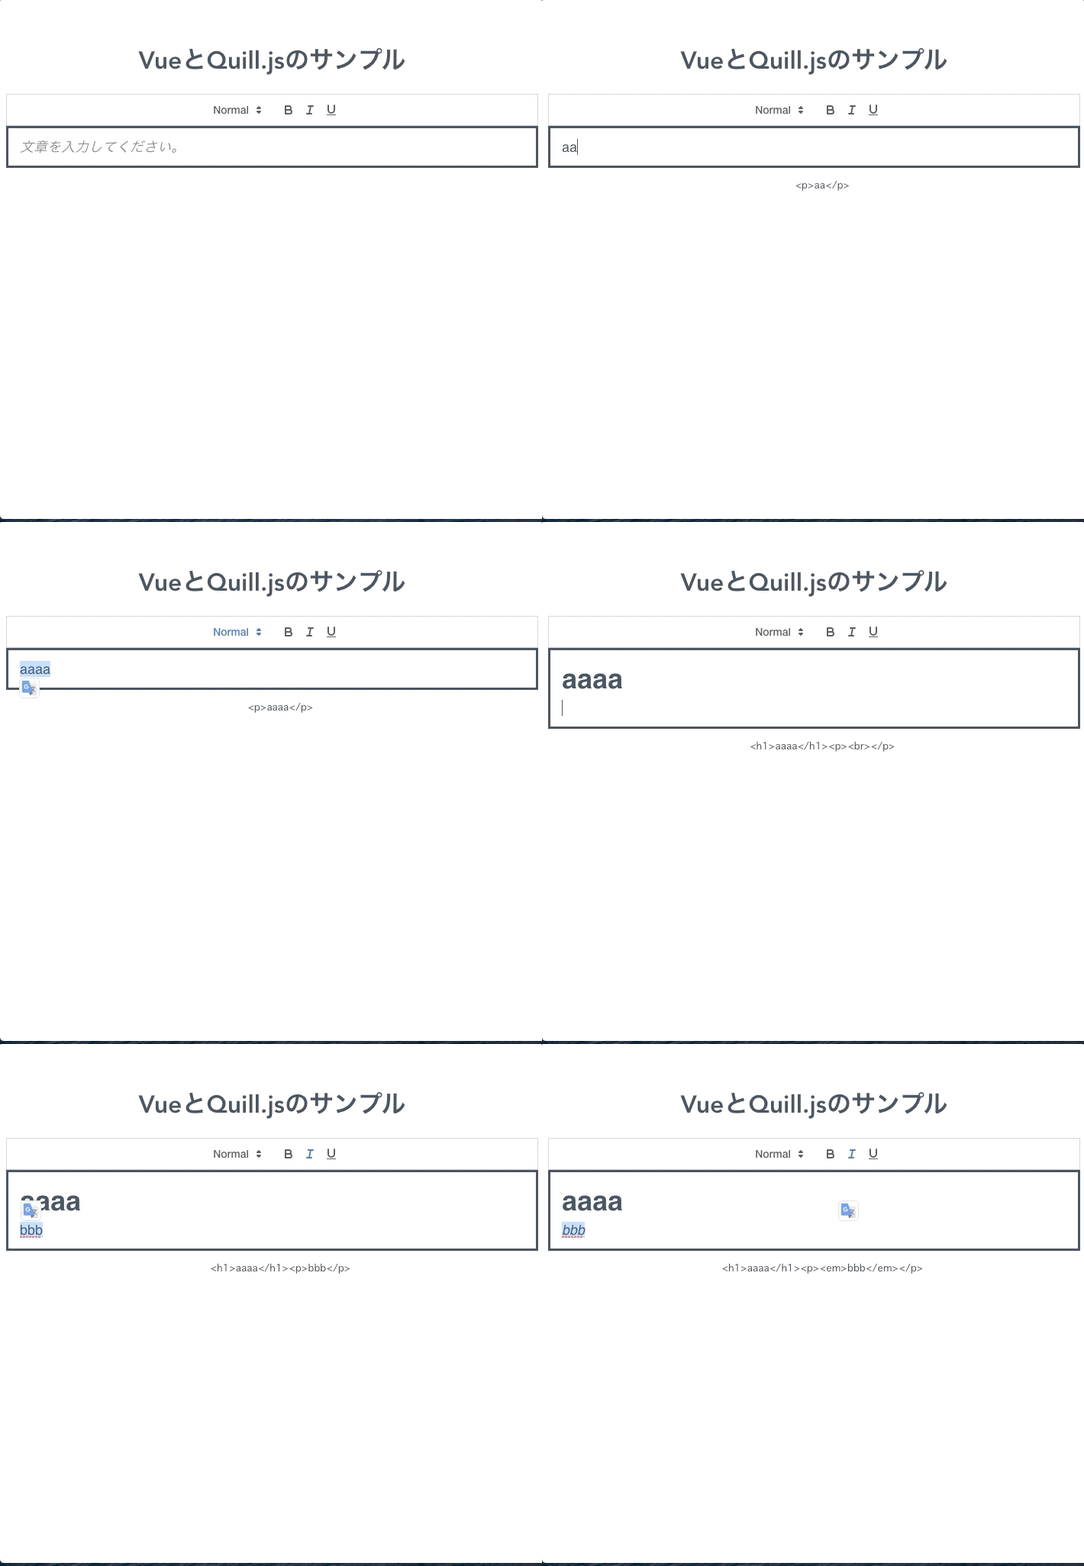
HTMLが文字列としてそのままやり取りされてしまってるのが確認できます。
HTMLでのやり取りをやめる
勘の良い方はわかると思いますが、HTMLがそのまま埋め込まれてるので、セキュリティ周りで不安になります。
Quill.jsは内部形式としてDeltaというJSONのサブセットが利用できるので、そちらでやり取りしてみようと思います。
(Editor.vue)
<template>
  <div class="editor-container">
    <div id="vue-quill-editor" ref="quillEditor"></div>
  </div>
  <div>
    <pre>
      {{ editorValue }}
    </pre>
  </div>
</template>

<script lang="ts">
import Quill from "quill";
import {
  defineComponent,
  reactive,
  onMounted,
  SetupContext,
  ref,
  computed
} from "vue";

interface State {
  editor: Quill | null;
}
interface Props {
  value: object;
}

export default defineComponent({
  props: {
    value: {
      type: Object,
      default: () => ({})
    }
  },
  setup(props: Props, ctx: SetupContext) {
    const state = reactive<State>({ editor: null });
    const quillEditor = ref<HTMLDivElement>();
    const editorValue = computed(() => props.value);
    const update = () => {
      if (!state.editor) return;
      // setContentsに変更
      ctx.emit(
        "editor-change",
        state.editor.getText() ? state.editor.getContents() : ""
      );
    };

    onMounted(() => {
      if (!quillEditor.value) return;
      const editor = new Quill(quillEditor.value, {
        modules: {
          toolbar: [
            [{ header: [1, 2, 3, 4, false] }],
            ["bold", "italic", "underline"]
          ]
        },
        theme: "snow",
        formats: ["link", "bold", "underline", "header", "italic"],
        bounds: document.body,
        debug: "warn",
        placeholder: "文章を入力してください。",
        readOnly: false
      });
      // バインディングの都合でstateの方に直接setContentsするとうまく動かない
      // 変更
      editor.setContents(props.value as any, "silent");
      editor.on("text-change", () => update());
      state.editor = editor;
    });
    return {
      state,
      quillEditor,
      update,
      editorValue
    };
  }
});
</script>
<style lang="scss" scoped>
.ql-container {
  font-size: 18px;
}
</style>
(App.vue)
<template>
  <div id="app">
    <h1>
      <div>VueとQuill.jsのサンプル</div>
    </h1>
    <quill-editor :value="state.editorText" @editor-change="input" />
  </div>
</template>

<script lang="ts">
import { defineComponent, reactive } from "vue";
import QuillEditor from "./components/Editor.vue";

interface State {
  // object型に変更
  editorText: object;
}

export default defineComponent({
  name: "App",
  components: {
    QuillEditor
  },
  setup() {
    const state = reactive<State>({
      editorText: {}
    });
    const input = (text: object) => {
      state.editorText = text;
    };
    return { state, input };
  }
});
</script>

<style lang="scss">
@import "~quill/dist/quill.core.css";
@import "~quill/dist/quill.snow.css";
// スタイルが邪魔だったので#appに対するものを削除
#vue-quill-editor {
  border: solid;
}
</style>

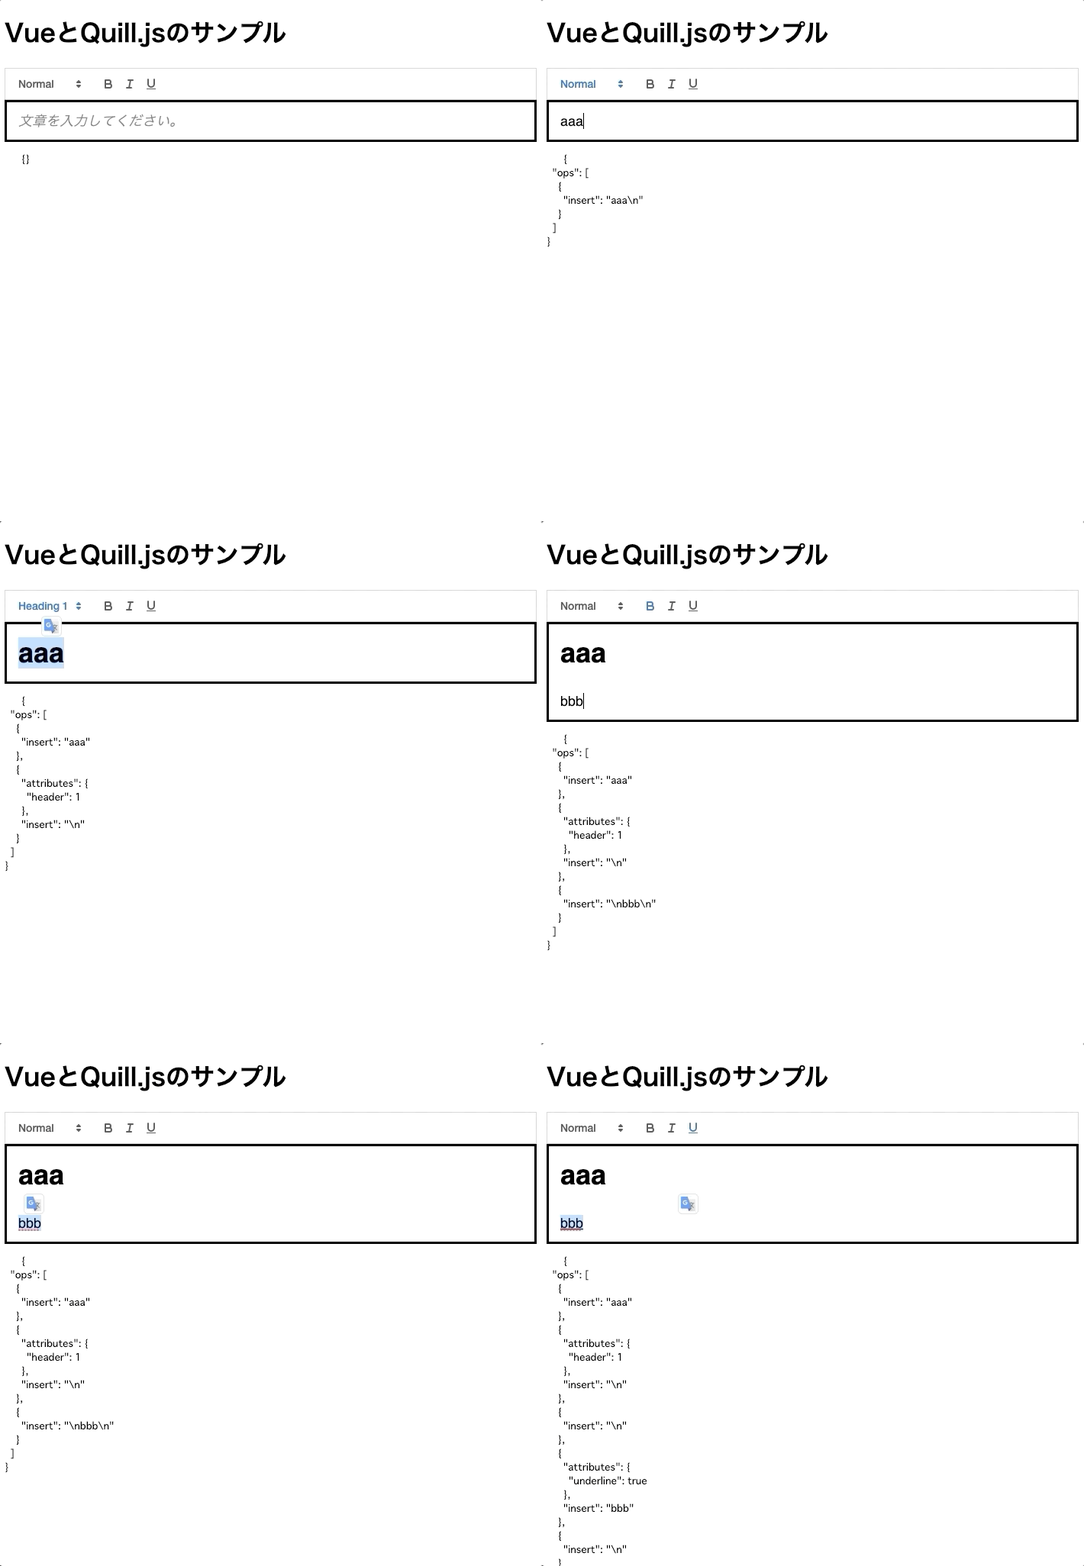
JSON形式でやり取りされてるのがわかります。
トップレベルのキーとして ops が存在し、 insert に実際の値が詰め込まれているのがわかります。
これで、実際に対応していない script などのタグは、JSONに保存されない上に、仮にJSONに現れたとしてもそもそもパースしてるときに対応している処理が無いので通常のテキストなどとして処理されます。
まとめ
今回は、WYSIWYGエディタを簡単につくれるQuill.jsをVue3と合わせて紹介してみました。
今回触れなかったこととしては、独自のカスタム形式の追加などがあります。公式サイトにサンプルなどがあるので、ぜひ御覧ください。
P.S.
虎の穴ラボ主催LT会開催!
虎の穴ラボ主催のオンラインLTイベントを 9/30(水)19:30〜 開催します! 今回もフリーテーマとなっており、ITに関連する内容であれば、何でも大歓迎ですので、初心者の方も練習の場としてお気軽にご参加ください! connpassにて参加受付中です!
カジュアル面談
弊社エンジニアと1on1で話せます、カジュアル面談も現在受付中です!こちらも是非ご検討ください。 yumenosora.connpass.com
その他採用情
虎の穴ラボでの開発に少しでも興味を持っていただけた方は、採用説明会やカジュアル面談という場でもっと深くお話しすることもできます。ぜひお気軽に申し込みいただければ幸いです。
カジュアル面談では虎の穴ラボのエンジニアが、開発プロセスの内容であったり、「今期何見ました?」といったオタクトークから業務の話まで何でもお応えします。
カジュアル面談や採用情報はこちらをご確認ください。
yumenosora.co.jp
